Mastering The Snipping Tool On Chromebook: A Comprehensive Guide
In the digital age, capturing screenshots and editing images has become an essential skill for both personal and professional use. If you're a Chromebook user, mastering the snipping tool on Chromebook is a game-changer. Whether you're a student, professional, or casual user, understanding how to effectively use this feature will enhance your productivity and streamline your workflow.
Chromebooks have gained immense popularity due to their simplicity, affordability, and seamless integration with Google services. However, one of the most overlooked features of Chromebooks is its built-in snipping tool. This powerful yet straightforward utility allows users to capture, annotate, and share screenshots effortlessly.
In this article, we will delve deep into the world of the snipping tool on Chromebook. From understanding its basics to unlocking advanced functionalities, you'll learn everything you need to know to harness the full potential of this feature. Let's get started!
Read also:Movierulz 2 The Ultimate Guide To Streaming Movies Online
Table of Contents
- Introduction to the Snipping Tool on Chromebook
- How to Access the Snipping Tool on Chromebook
- Types of Screenshots You Can Take
- Customizing Your Screenshot
- Saving and Sharing Screenshots
- Advanced Features of the Snipping Tool
- Troubleshooting Common Issues
- Tips for Efficient Use of the Snipping Tool
- Alternatives to the Built-In Snipping Tool
- Conclusion
Introduction to the Snipping Tool on Chromebook
The snipping tool on Chromebook is a versatile utility designed to help users capture specific parts of their screen. Unlike traditional screenshot methods, this tool allows for precision and flexibility, enabling users to select specific areas, windows, or the entire screen. It's an indispensable tool for anyone looking to document processes, create tutorials, or simply save important visual information.
This feature is particularly useful for students who need to capture lecture slides, professionals who want to share specific parts of documents, or creatives who require precise image capture for their projects. By mastering the snipping tool, you can significantly enhance your productivity and efficiency on a Chromebook.
As we delve deeper into this guide, you'll discover how to access, use, and customize this tool to suit your needs. Whether you're a beginner or an advanced user, there's something new to learn about the snipping tool on Chromebook.
How to Access the Snipping Tool on Chromebook
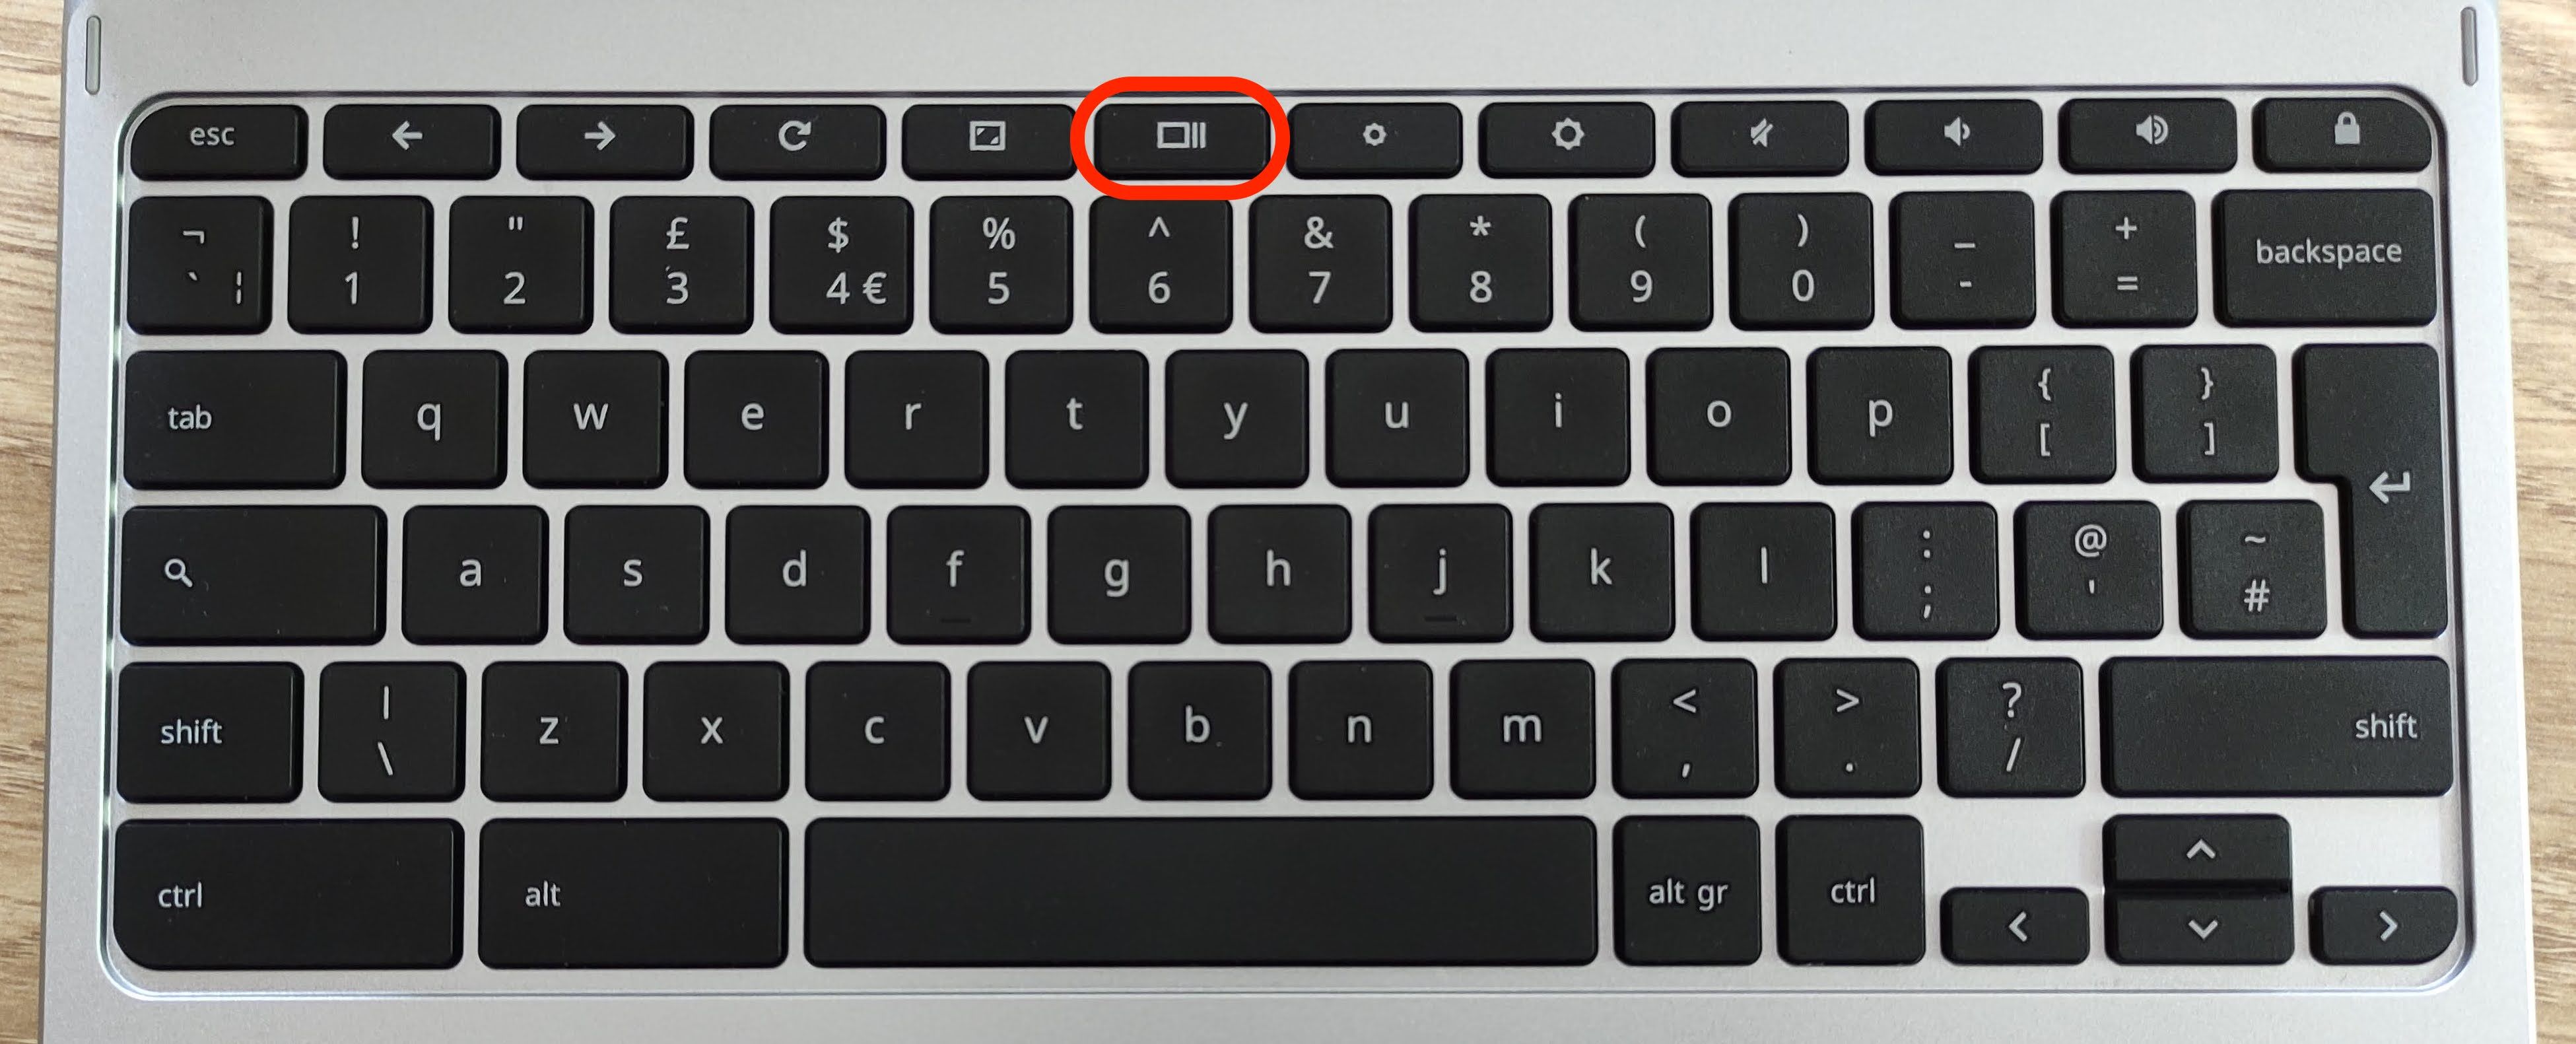
Understanding the Shortcut Keys
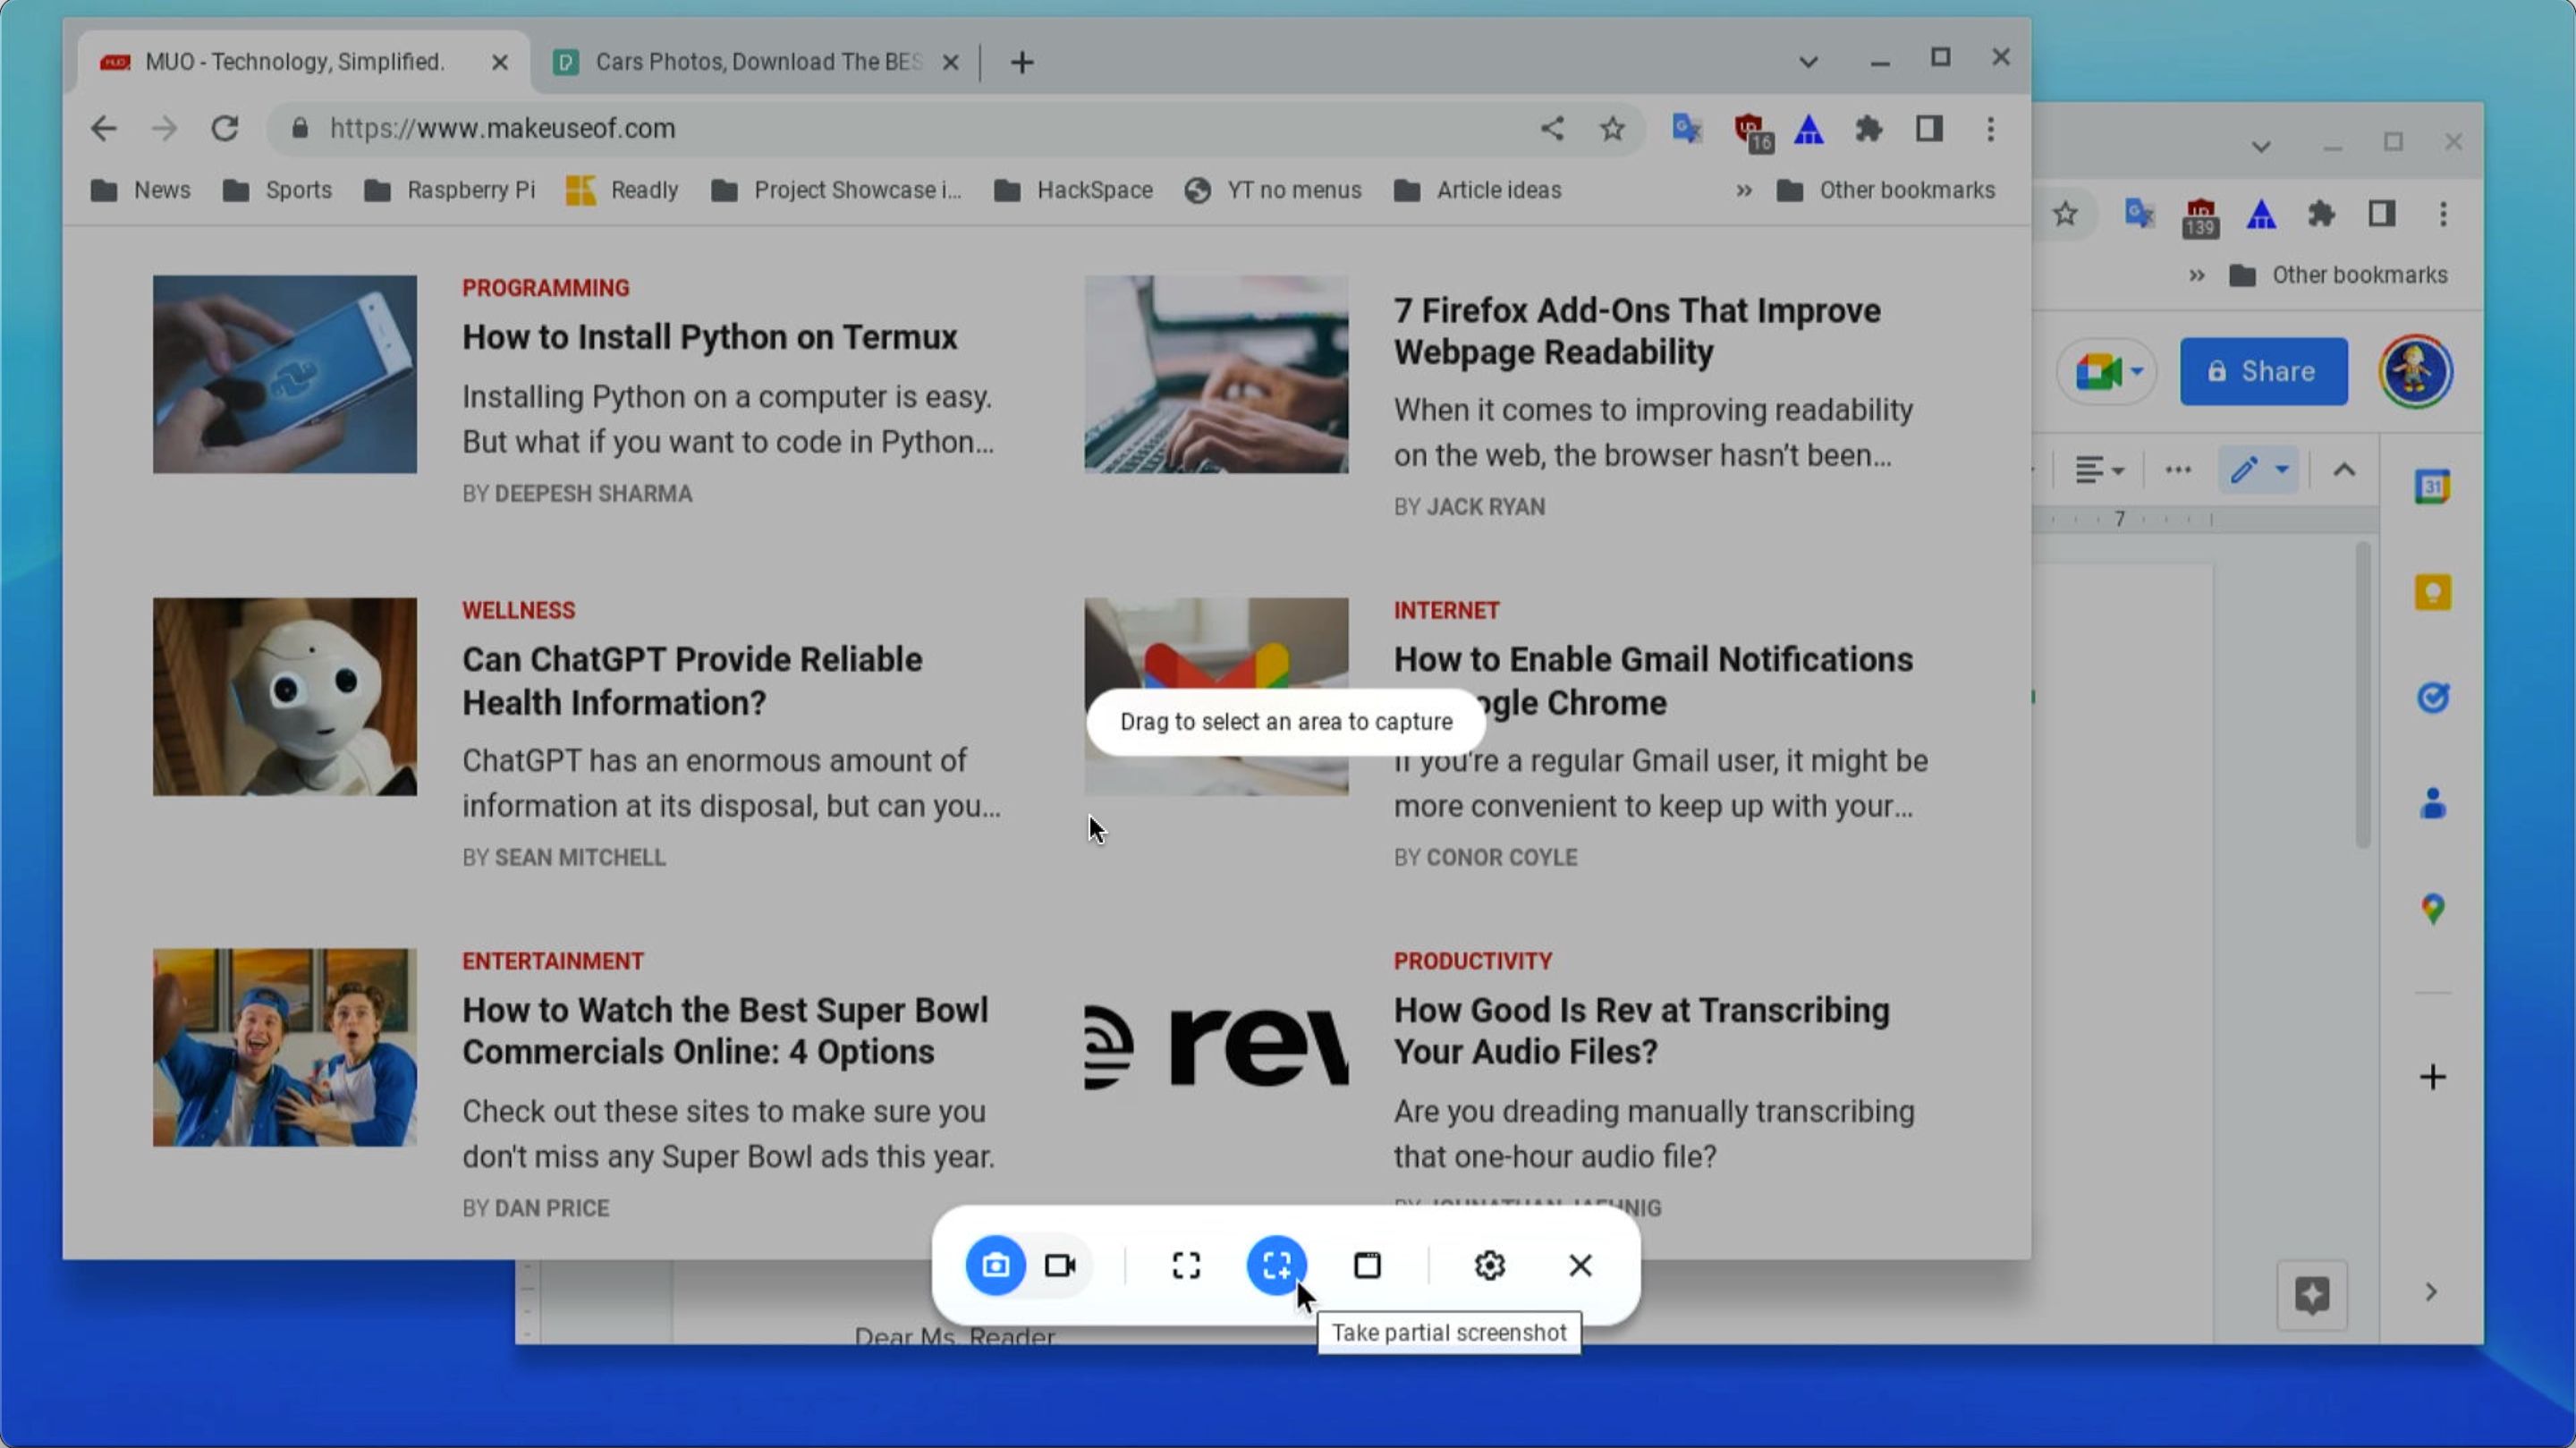
Accessing the snipping tool on Chromebook is straightforward and can be done using keyboard shortcuts. To open the tool, press the Search key + Shift + S simultaneously. This will launch the snipping tool interface, allowing you to choose the type of screenshot you wish to capture.
Alternatively, you can access the tool through the Settings menu. Navigate to Device > Keyboard shortcuts, and under the "System" category, you'll find the shortcut for the snipping tool. Customizing this shortcut can make it even easier to access if you frequently use the tool.
Launching from the Launcher
Another way to access the snipping tool is by searching for it in the launcher. Simply click on the launcher icon in the bottom-left corner of your screen, type "snipping tool," and select the option that appears. This method is especially useful if you're unfamiliar with keyboard shortcuts.
Read also:Camilla Ara%C3%BAjo Porn
Types of Screenshots You Can Take
Full Screen Capture
One of the most common uses of the snipping tool is capturing the entire screen. This is ideal for saving a complete view of your desktop or any open applications. To capture the full screen, simply select the "Full screen" option in the snipping tool interface.
Window Capture
If you only need to capture a specific window, the snipping tool allows you to do so effortlessly. By selecting the "Window" option, you can choose which window to capture, ensuring that only the relevant information is saved.
Custom Region Capture
For more precise control, the "Custom region" option lets you select a specific area of the screen. This is perfect for highlighting particular sections of a document, image, or webpage. Simply drag your cursor to define the area you wish to capture.
Customizing Your Screenshot
Adding Annotations
Once you've captured a screenshot, the snipping tool offers basic annotation features. You can add arrows, highlight text, or draw shapes directly on the image. These annotations can help emphasize important details or provide additional context to your screenshots.
Adjusting Image Settings
While the snipping tool doesn't offer advanced editing features, you can adjust basic image settings such as brightness and contrast. This ensures that your screenshots are clear and visually appealing. For more advanced editing, you can export the image to a dedicated photo editing application.
Saving and Sharing Screenshots
Default Save Location
By default, screenshots captured using the snipping tool are saved in the "Downloads" folder on your Chromebook. You can change this location by navigating to the settings within the tool. This flexibility allows you to organize your screenshots more effectively.
Sharing Options
Once your screenshot is saved, you can easily share it via email, messaging apps, or cloud storage services like Google Drive. The snipping tool integrates seamlessly with these platforms, making it simple to share your captures with others.
Advanced Features of the Snipping Tool
Timed Capture
One of the lesser-known features of the snipping tool is its ability to schedule timed captures. This is particularly useful for capturing dynamic content or processes that require a delay. To use this feature, set the timer in the tool's settings before initiating the capture.
Screen Recording
While not traditionally considered a screenshot tool, the snipping tool on Chromebook also supports basic screen recording. This feature allows you to capture video of your screen, which is ideal for creating tutorials or documenting processes.
Troubleshooting Common Issues
Tool Not Launching
If you're experiencing issues with the snipping tool not launching, ensure that your Chromebook is up to date. Outdated software can sometimes cause compatibility issues. Additionally, check your keyboard settings to ensure that the shortcut keys are correctly configured.
Screenshot Quality Issues
In rare cases, users may encounter issues with screenshot quality. This can often be resolved by restarting the Chromebook or adjusting the display settings. If the problem persists, consider reaching out to Chromebook support for further assistance.
Tips for Efficient Use of the Snipping Tool
- Practice using the shortcut keys to access the tool quickly.
- Experiment with different capture types to find what works best for your needs.
- Use annotations sparingly to maintain clarity and professionalism.
- Organize your screenshots in folders to keep them easily accessible.
- Regularly back up your screenshots to cloud storage for added security.
Alternatives to the Built-In Snipping Tool
Third-Party Applications
While the built-in snipping tool is highly effective, there are several third-party applications available that offer advanced features. Tools like Snagit and Greenshot provide more robust editing capabilities and customization options. However, it's important to weigh the benefits against the additional cost and complexity.
Chrome Extensions
For those who prefer lightweight solutions, Chrome extensions like Screenshot – Full Page Capture offer a convenient way to capture and edit screenshots directly from your browser. These extensions integrate seamlessly with Chromebook and provide additional functionalities beyond the built-in tool.
Conclusion
In conclusion, the snipping tool on Chromebook is a powerful and versatile utility that can significantly enhance your productivity. By mastering its features and functionalities, you can capture, edit, and share screenshots with ease. Whether you're a student, professional, or casual user, this tool has something to offer for everyone.
We encourage you to practice using the snipping tool regularly to become more proficient. Don't forget to explore the advanced features and consider alternatives if you require more advanced functionalities. Finally, feel free to share this article with others who may benefit from it, and leave a comment below with your thoughts or questions. Happy screenshotting!

